On the 7th of November, the Optics-trade team went to the shooting range near Slovenska Bistrica to do an in-the-field comparison of 8 IR-illuminators. The shooting range is located a few kilometers away from our headquarters.
- Testing conditions
- Testing IR devices
- Which provides the best IR light: LED or Laser based?
- Infrared Illuminator paired with Night Vision devices
- Often asked questions when it comes to illuminators:
- Problems during the test
- Important lessons
- Gen 1 analog night vision devices performe well with high-quality IR lights
- Does more expensive also mean better?
- Focus on Illuminator is important
- Adjusting the beam direction is a must on longer distances
- Continuous regulation VS Preset levels of illumination intensity
- Infrared Illuminator on Digital NV devices
- Infrared Illuminator on Analog NV devices
- Pulsar AL-915 IR illuminator
- Conclusion
- The +/– Table
You can also watch the entire The ULTIMATE IR illuminator test below
Testing conditions
To clearly distinguish between the beams emitted by each IR illuminator, we made 8 signs, each marked with the name of the illuminator, so that we could later point the beam of each of the illuminators at a corresponding sign.
We placed the signs – targets – in two rows, the first row 65 m and the second row 70 m away from us. They were put on a steep bank so that a clear reflection could be observed when pointing the beam at each target. The signs had to be placed at an adequate distance one from the other so that the beams of illuminators would not overlap. This was only partly achieved because we had limited space.
The preparation for the test took place during the day. The test, however, was filmed when it got dark. We also kept in mind to do it during the new moon phase and away from all the artificial light sources so that optimal results could be acquired.

Testing IR devices
These are the infrared illuminators that we put to the test:
- Pulsar 940 IR,
- Pulsar X850 IR ,
- Pulsar AL-915 IR ,
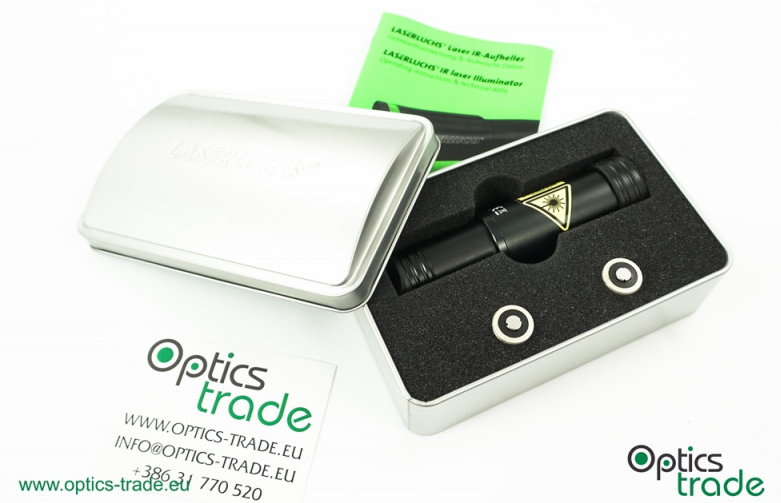
- Laserluchs LA 850-50-PRO II,
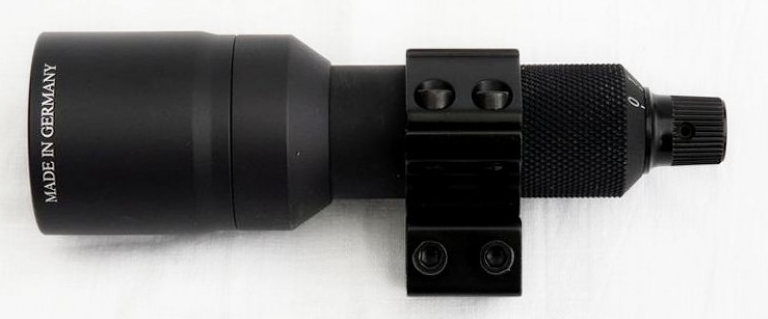
- Jahnke Phönix Focus 875,
- Jahnke Phönix 5 Ultra 850,
- Ados Tech/ElectroOptik IR-530 (850), and
- Dipol L2 850.
The three-digit numbers starting with ‘8’ or ‘9’ stand for the wavelength of light that the illuminator emits.
These illuminators are powered either by an LED or a laser. Pulsar AL-915 IR, Dipol L2 850, Ados Tech/ElectroOptik IR-530 and Laserluchs LA PRO II are powered by a laser, while the other four use an LED as a light emitting source.
Wanto to know more about LED and Laser illuminators? Check them out below
Which provides the best IR light: LED or Laser based?
It is difficult to say which light emitting source is better since other factors such as build quality have to be taken into account. In theory, a laser should be better as it emits light in a far narrower spectrum.
What IR wavelength is best for Night Vision?
For example, a laser-powered infrared illuminator where the number ‘850‘ denotes the wavelength of the light that it emits, will emit light from, let’s say, 845 to 855 nm of wavelength, whereas, while using an LED-powered illuminator with the same wavelength specifications, it can happen that light emitted is in a wider spectrum, namely from 800 to 900 nm.
Since most animals detect light with a wavelength of up to 850 nm, it can happen that the user will be detected using an LED IR-illuminator that supposedly emits light with a wavelength of 875 nm.
Infrared Illuminator paired with Night Vision devices
The emphasis of the test was on the illuminators. Still, it is worth mentioning that we used the illuminators in conjunction with five different night vision devices, three analog and two digital. We brought many different night vision devices to the test so that we could see how different infrared illuminators perform together with different NV technologies (analog and digital).
Testing with Analog NV devices
The analog night vision devices that we used were Jahnke 1×56 gen 2+, two Dipols DN 55XT gen 2+ – both clip-ons, one with a green and the other one with a white photocathode – and Pulsar Challenger GS, a monocular.
Testing with Digital NV devices
Pulsar Digiforce 860RT monocular and Forward F135 clip-on comprised the selection of digital night vision devices that we included for the testing.
The best combination
Basically, we wanted to see which combo is better:
- an affordable NV device/expensive illuminator or
- an expensive NV device/cheap illuminator.
We mounted the clip-ons on the Schmidt&Bender PM II Ultra Short 3–20×50 and Noblex N6 2–12×50.

Often asked questions when it comes to illuminators:
- Do illuminators that emit a light with a wavelength of 850 nm work with digital night vision devices?
- Do analog night vision devices detect light with a wavelength of 915 or even 940 nm?
These questions are best answered through a field test, which is another reason we chose to do this test. Furthermore, we wanted to see to what degree do more expensive night vision optics perform better in conjunction with the illuminators than cheaper night vision optics.
Problems during the test
We faced some problems when doing the test:
- First, it is really difficult to film a high-quality video of the illuminator beams when the camera is placed behind the riflescope with a mounted clip-on.
- Secondly, it was dark, and there were plenty of analog night vision devices on the desk.
These devices are sensitive to light and can easily get damaged, which is why we had some problems setting the camera correctly as we had to point the flashlight’s beam of light away from these devices and set it to the lowest possible setting. It was quite cold outside, so our hands were freezing.
Because we had limited space and filmed the test in a narrow passage, the light beams of certain illuminators overlapped with the beams of others. Also, we had to clear the terrain of several bushes and branches before doing the test.
Finally, we had major problems with adjusting the sharpness of the video clips – we had to adjust the focus of each night vision device, the focus of the riflescope on which the NV device was mounted, and lastly, the focus of the camera lens – not to mention the additional problems that came with the dark.
Looking for more information about IR Illuminators?
Important lessons
We have learned that if you had to pick between the combinations of an expensive NVD/low-quality illuminator and an affordable NVD/high-quality illuminator, the latter would be a better choice.
Gen 1 analog night vision devices performe well with high-quality IR lights
It is a common misconception that if one owns a high-quality NVD device, the illuminator is of little importance. Even if you own one of the best gen 2+ analog night vision devices available such as Jahnke 1×56 Hypergen, its performance will suffer without a proper illuminator.
Saving money on an illuminator is thus one of the biggest mistakes a user of an NVD can make. The quality of the illuminator is especially important if you have an affordable night vision device.
Does more expensive also mean better?
Up to a point, that is true, but some additional explaining is required. Pulsar makes affordable, entry-level illuminators, which perform very decently for the price. Their disadvantage is the housing which is made from plastic. Also, one cannot focus the beam as well as with some other, more expensive illuminators (on the latter, a very focused beam can be set whereas Pulsar illuminators’ beams cover up the entire field of view and cannot be finely focused).
Expensive, high-quality illuminators made by Jahnke and Laserluchs are better built (made of metal), more robust, and perform better. The most notable advantages that expensive illuminators have over the more affordable ones are the possibility to focus the beam better, sharp beam edges, and usually, a simpler solution for the intensity regulation.
What surprised us the most is how well the illuminator by Ados Tech performed. Even though it is available at quite a lower price than Laserluchs and Jahnke, it was extremely effective. Its only downsides are the big, bulky appearance and 3 available intensity levels (there could have been more). Another pleasant surprise was the entry-level Pulsar X850 which performed outstandingly.
Focus on Illuminator is important
We also learned that focus on an illuminator is of great importance, especially if you plan on using your illuminators at longer distances. The only illuminator we tested that did not have the option of focusing was Jahnke Phönix 5. We concluded that the illuminators which lack focus work well only in specific situations – at short distances, for example.
Watch Optics Trade debate on IR Illuminators below
Adjusting the beam direction is a must on longer distances
With some illuminators, the user can adjust the beam direction, while others do not offer this feature. The ability to adjust the beam direction is of little to no importance if you are using the device at short distances. If you use the device at longer distances, such as 100 m or more, both the possibility to focus the beam and to point the beam of direction at the center of the field of view are a must.
The manufacturers are implementing this feature in two ways:
- either the user adjusts the beam direction on the mount or
- on the device itself.
Laserluchs LA 850-50-PRO II and Jahnke Phönix Focus 875 use the first solution which is somewhat clumsy but works (the user must buy a ring that allows such a setting since Laserluchs comes without a ring while Jahnke Phönix Focus comes with a ring for 11mm dovetail that doesn’t allow this setting).
Pulsar and Dipol use the second solution but in different manners. On Pulsar illuminators, unscrewing a rotating ring near the front of the device will allow you to move the hood in all directions, pointing the beam in whichever direction you see fit.
Dipol uses a technique that is identical to the one we see on riflescopes – there are two adjustments ‘turrets’ with which you can set the beam in the desired direction.
If the ability to adjust the beam direction and focus is especially useful at longer distances, the importance of having the possibility to adjust illumination intensity will be noted at shorter distances. Illuminators without this option use a single setting which is, in most cases, far too bright for observing objects up to 50 m away.
Continuous regulation VS Preset levels of illumination intensity
We divided illuminators that offer the ability to adjust the illumination intensity in two groups. Some, like the illuminators made by Pulsar, offer continuous regulation, while others, like Jahnke Phönix, offer several, pre–set levels of illumination intensity.
From our experience, the former solution is better since it allows the user to set the illumination much more precisely. With Laserluchs, setting the intensity is not possible without a dimmer which must be bought extra. Since this accessory is much needed, purchasing it is recommended.
Infrared Illuminator on Digital NV devices
If you are using a digital night vision device, the most sensible thing to do is use an illuminator that emits either light with 915 or 940 nm of wavelength, since digital night vision devices are designed to detect this wavelength. You will also be invisible when observing the game.
Infrared Illuminator on Analog NV devices
In theory, analog night vision devices should not be able to detect a light with a wavelength of 940 nm. With Dipol and Jahnke analog night vision devices, we were, nevertheless, able to detect some light emitted by Pulsar AL-915 and Pulsar 940 IR.
This is because these illuminators are powered by an LED which emits light from a wider spectrum. We inferred that some of the light emitted is of the wavelength still detectable by analog night vision – with Pulsar AL-915, for example, we did not detect a rectangular beam but a single line.
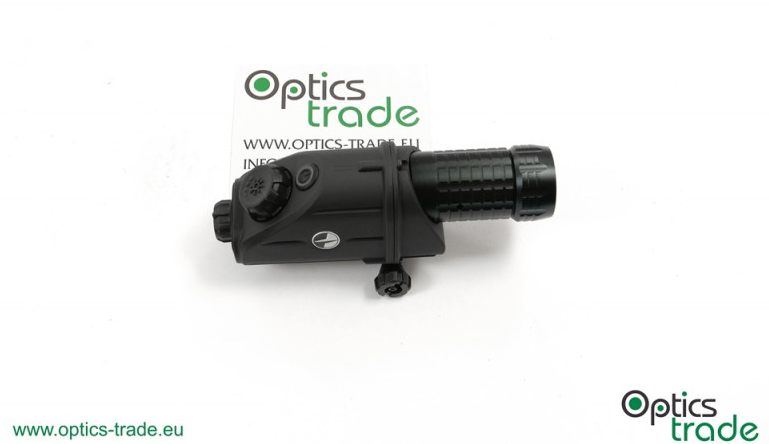
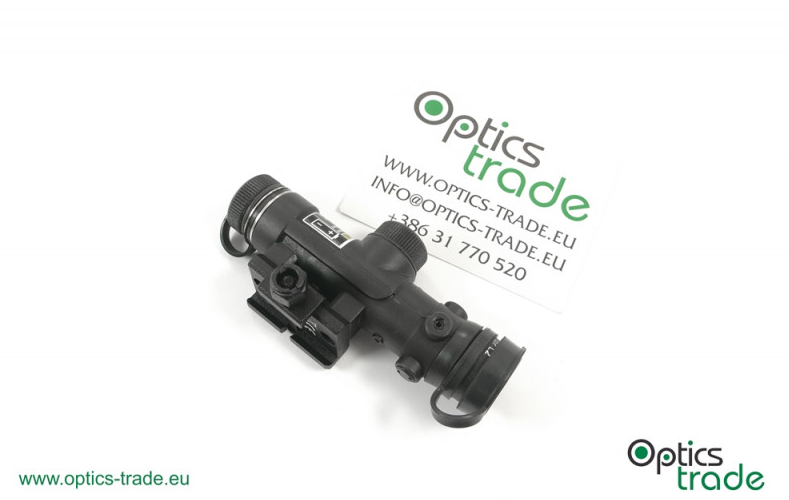
Pulsar AL-915 IR illuminator
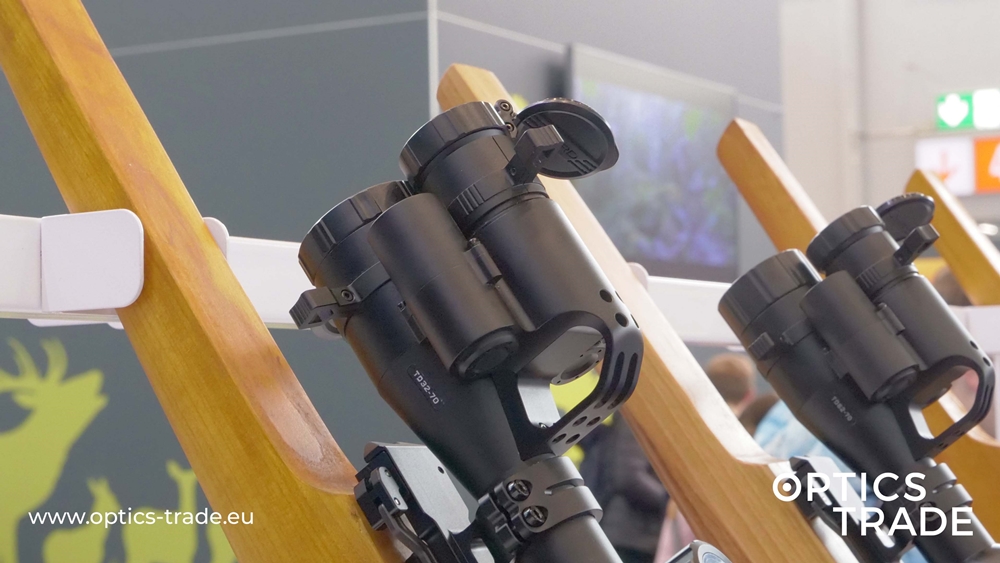
Now, a word or two about the Pulsar AL-915 IR illuminators which emit light in the shape of a rectangle. There are two models in this series:
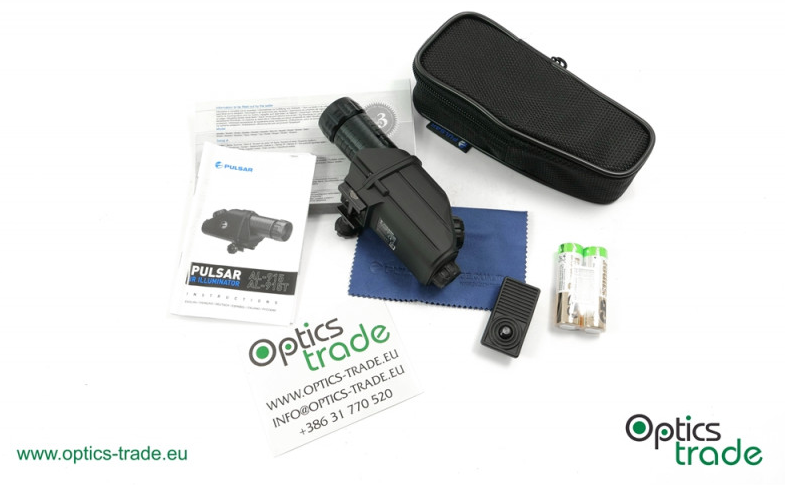
The letter ‘T’ designates that the model is suitable for mounting on top, while the model that lacks this letter is an appropriate choice if you have a mounting surface on the side of your device. These illuminators work best with digital night vision devices that have a rectangular screen and a rectangular sensor since the entire field of view will be illuminated.
Check out our video about Pulsar AL-915 VS AL-915T below
Conclusion
To sum up, let’s point out a few important facts concerning each of the illuminators that we tested.
Jahnke IR illuminators
Jahnke Phönix 5 Ultra lacks focus, which makes it suitable only for specific uses, namely for short distances up to 50 m. From 50 m onwards, Jahnke Phönix Focus 875 is a better choice.
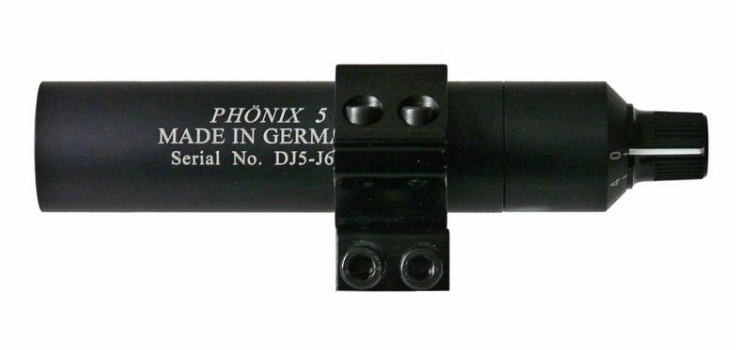
With both these illuminators, the build quality is superb. They emit light with a wavelength of 875 nm, which makes them suitable for digital and analog night vision devices. Additionally, the user is invisible from the game since this wavelength is outside of their visible spectrum.
Laserluchs IR illuminator
The Laserluchs illuminator performed outstandingly well. The build quality is also very good. The disadvantage is the lack of intensity regulation, which can be added by purchasing a suitable dimmer. If you plan on using the device at distances longer than 50 m, this extra purchase is a must.
Pulsar IR illuminators
We tested three infrared illuminators by Pulsar which – as regards price – fall into the category of entry-level illuminators. The build quality is, of course, not on the same level as with infrared illuminators made by Jahnke and Laserluchs. However, they perform surprisingly well.
Pulsar 940 IR
The 940 IR model worked best with digital night vision devices, with analog not so well (it emits light with a wavelength of 940 nm, so this was expected).
This model has since been discontinued.
Pulsar AL-915 IR
The 915 AL also worked best with digital night vision devices since they have a screen in the shape of a rectangle. Again, as expected, the device didn’t fare well with analog night vision optics as it emits light with a wavelength that is out of reach for analog night vision.
Pulsar X850 IR
The Pulsar X850 infrared – illuminator was, perhaps, the biggest surprise out of the three. It worked well with both analog and digital night vision devices. It emits an unusually strong beam of light. There were some disadvantages – the border of the beam was not as sharply defined as it could be, and we could not adjust the focus the way we wanted (the beam emitted was very wide even at max. focus).
All in all, we would still list this as one of the best buys considering its price/performance ratio.
Unfortunately, Pulsar decided to discontinue this model.
Dipol L2 850 IR illuminator
The Dipol L2 850’s advantages are its small size and weight, zeroing system and beam adjustment. Unfortunately, we were not happy with its performance. However, Dipol discontinued this product and will launch a new version soon. If they manage to improve its performance, this illuminator will surely become a hit.
Ados Tech illuminator
The Ados Tech illuminator is by far the most powerful of the devices that we tested. After the test, we tried pointing it to a distance of 300 m and it still worked like a charm. This is amazing considering that it costs less than Jahnke and Laserluchs IR illuminators. Its disadvantage is that it is big and bulky.
Stay tuned for more of our tests.
The +/– Table
| Advantages (+) | Disadvantages (–) | Notes | |
| Pulsar 940 IR | + Works well with digital NV;
+ low price; + continuous intensity regulation; + the user cannot be detected by the game; + simple to set the beam direction. | – Housing made of plastic;
– the beam is wide even when maximally focused. | A great entry-level illuminator for a digital NVD. |
| Pulsar X850 IR | + Works well with analog and digital NV;
+ low price; + emits a very strong beam of light; + continuous intensity regulation; + simple to set the beam direction. | –The border of the beam is not as sharply defined as it could be;
– the beam is wide even when maximally focused; – housing made of plastic. | A best-buy entry-level illuminator which was, unfortunately, discontinued by Pulsar in 2018. |
| Pulsar AL-915 IR | + Works well with digital NVD with a rectangular screen;
+ low price; + continuous intensity regulation; + the user cannot be detected by the game; + simple to set the beam direction. | – Housing made of plastic;
– not compatible with analog NVD that have a circular screen. | Only for digital NVD with a rectangular screen. On the devices of this type, it performs nicely. |
| Laserluchs LA 850-50-PRO II | + superb build quality;
+ outstanding performance. | – setting the intensity is only possible with a dimmer which must be bought extra;
– expensive; – the beam direction can only be adjusted with a suitable mount. | A great illuminator, but for an efficient use, purchasing an extra dimmer is a must. |
| Jahnke Phönix Focus 875 | + superb build quality;
+ outstanding performance; + the user cannot be detected by the game; +suitable for analog and digital night vision devices. | – expensive;
– the beam direction can only be adjusted with a suitable mount. | An excellent illuminator, combining great build quality and performance. |
| Jahnke Phönix 5 Ultra | + great build quality;
+ small, lightweight. | – Beam direction cannot be adjusted;
– The beam cannot be focused. | A great choice if you plan to use the illuminator up to 50 m and not more. |
| Ados Tech/ElectroOptik IR-5 | + The most powerful illuminator that we tested;
+ An outstanding performance for a reasonable price; + Works up to 300 m without problems. | – Only 3 intensity levels to choose from;
– big and bulky. | Amazing performance for the price. The absolute winner of our test. |
| Dipol L2 850 | + small size and weight (the smallest of the 8 tested illuminators);
+ innovative zeroing system, identical to the one found on red dot sights; + great beam adjustment (can be nicely focused). | – It could perform better based on its price. | Dipol will soon release an updated version of this illuminator which we are looking forward to. |