Products:
- https://www.optics-trade.eu/en/schmidt-bender-klassik-2-5-10×56.html
- https://www.optics-trade.eu/en/schmidt-bender-klassik-3-12×42.html
- https://www.optics-trade.eu/en/schmidt-bender-klassik-3-12×50.html
- https://www.optics-trade.eu/en/schmidt-bender-klassik-4-16×50-p.html
- https://www.optics-trade.eu/en/schmidt-bender-klassik-6×42.html
- https://www.optics-trade.eu/en/schmidt-bender-klassik-10×42.html
- https://www.optics-trade.eu/en/schmidt-bender-klassik-7×50.html
- https://www.optics-trade.eu/en/schmidt-bender-klassik-8×56.html
- https://www.optics-trade.eu/en/schmidt-bender-klassik-lms-2-5-10×56.html
- https://www.optics-trade.eu/en/schmidt-bender-klassik-lms-3-12×50.html
1. SCHMIDT & BENDER congratulates you on the purchase of your new
telescopic sight.
You now possess a high-quality product, which will provide you with many years of reliable service if fitted carefully by a qualified gunsmith in accordance with the following instruc tions of use.
2. Safety information:
- Never look into the sun with the telescopic sight or you may seriously damage
your eyes. - Never tamper with the telescopic sight yourself. Repairs should be effected exclusively by SCHMIDT & BENDER or by SCHMIDT & BENDER authorized workshops.
- Please protect your telescopic sight from shocks that extend beyond normal use.
3. Assembly
The weapon and telescopic sight must be perfectly fitted to become a single unit. That’s why we urgently recommend that the telescopic sight always be fitted and zeroed in by a quali fied gunsmith. In this regard, particular care must be taken that the telescopic sight is attached with sufficient distance from the eyes. On the one hand, this will guarantee the full scope of view, and on the other, it will – in the proper firing position – prevent eye injuries caused by the weapon’s recoil.
4. Zeroing in the telescopic sight with the weapon
Careful pre-assembly with preliminary zeroing at the workshop will ensure that the telescopic sight can be then correctly zeroing in with just a few clicks. Initially, the gunsmith will make sure that the vertical and horizontal reticles are centred within the available adjustment range.
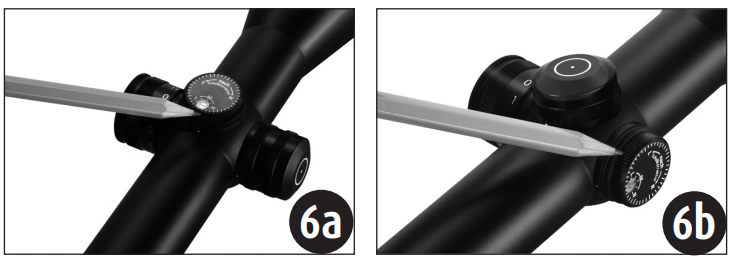
5. SCHMIDT & BENDER graduation display
simplifies this test: the black spot in the display’s window on the vertical and horizontal adjustment should be positioned under the letter „M“ (middle). This ensures that the maximum adjustment range is available on both sides during the zero ing-in process. This is the factory setting.
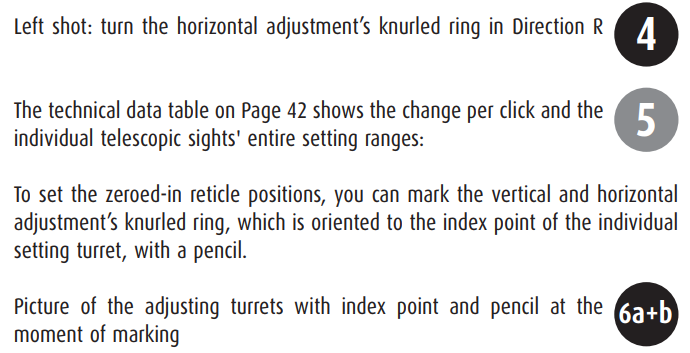
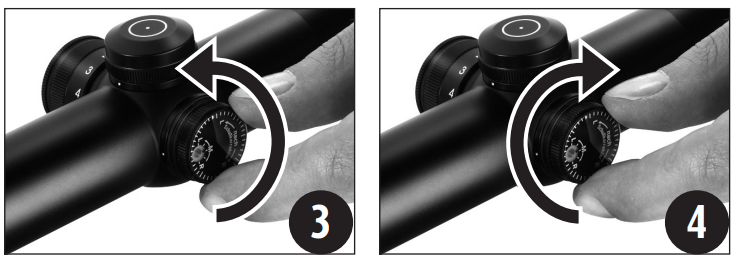
Shot patterns that deviate from the point of aim can be very easily and precisely corrected with the click mechanism on the horizontal and vertical adjustment. Here, the reticle always remains in the centre of the visible image. Adjustments are possible when the saddle caps have been removed:


6. Dust- and moisture-proof
SCHMIDT & BENDER telescopic sights are produced with high quality seals. Careful workmanship and stringent leak tests with subsequent nitrogen filling ensure that the devices are watertight to a depth of three metres. Except for the illu mina ted reticle turret, this also applies when the saddle caps have been removed.
7. Parallax
All telescopic sights are adjusted at the factory to be parallax free at 100 metres if no other distance was specified in the order. The 4-16×50 Long Range/Varmint model possesses its own parallax compensation, which is easy to use and is located in the third turret opposite the horizontal adjustment. This feature allows the marksman to adjust the telescopic sight’s par allax without having to take his eyes off the target.
The parallax compensation’s adjusting ring is marked with the distances 50m, 100m, 200m, 300m, 400m, 500m and ∞. If the distance is known, turn the adjusting ring so that the desired distance aligns with the index point on the turret.
If the distance is not known, set the zoom to 16-power. Then move the parallax compensation’s adjustment ring in the direction of the roughly estimated distance until you see as focused an image as possible. Now purposely move your eye quickly up and down in the area of the exit pupil while simul taneously correcting the parallax compensation’s adjustment ring until no movement is visible between the reticle’s centre and the target.
8. Adjusting the focus with the eyepiece’s dioptric compen sation
Set your telescopic sight to maximum power. Turn the eyepiece to the left as far as possible. Then turn it to the right until the best focus for you has been achieved.

9. Using the illuminated reticle
The illuminated reticle has been designed to help you better find your point of aim on usually dark game.
First adjust the light intensity of the reticle to the ambient light conditions. Turn the illuminated turret’s adjusting knob from 0 towards 11 until you reach the point which just suffi ciently illuminates the illuminated part within the reticle with out the intensity at your eye being excessive. You should make this adjustment in peace and quiet before commencing the hunt.

Now you can switch off the illuminated unit to save power by turning the adjustment knob from the locked setting to the position between the next and previous settings. This „intermediate position“ interrupts the power supply (stand-by mode). Now, just before firing, briefly click the knob into the selected position and your reticle will be illuminated in precisely the desired intensity. Don’t forget to switch off the illuminated reticle after firing.
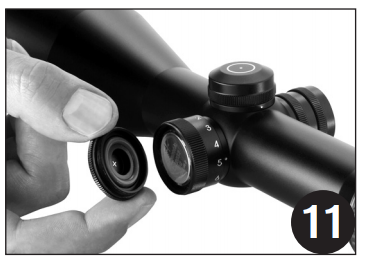
Unscrew the illuminated unit’s cap to change the battery. Remove the empty battery, which you must dispose of in an environmentally friendly way. When inserting the new battery, make sure that its plus symbol is visible fram the top. Change the battery in a dry location. The battery used is a commerci – ally available CR 2032/3V round cell, which at mean intensity will provide power for 100 hours of continuous use.

As an accessory a turret cap, which contains a spare battery, is avail able and fits both the windage or the elevation turret.

10. Cleaning your SCHMIDT & BENDER telescopic sight
All the metal components have a hard anodized finish, which is easy to care for and extremely scratchproof. Please use a clean cloth for cleaning.
You should first remove any coarse dust particles with a brush from the scopes’ surfaces before wiping them clean. They should always be cleaned with a damp cloth. Distilled or puri fied water is preferable. Always avoid dry-rubbing the lenses’ external surfaces because this damages the valuable protective coating. Steel scopes should – if they have been bronzed – be lightly oiled with gun oil after cleaning and any drying. Coated scopes should be treated in the same way as those with anodized sur faces.


